
As electricity prices rise and environmental concerns grow, more people are turning to solar power as a smart, sustainable solution. But one question still confuses many: how to install solar panel systems properly and safely?
Whether you’re planning to install solar panels for your home, office, factory, or farm, this guide will walk you through everything you need to know, step by step. It’s not just about placing panels on your roof — it’s about understanding your energy needs, choosing the right components, and ensuring safe, efficient operation for years.
Let’s dive in.
Why Go Solar?
Before we talk about how to install a solar panel system, here’s a quick refresher on why you should even consider it:
- ✅ Save up to 90% on your electricity bills
- ✅ Reduce dependence on grid power or diesel
- ✅ Get 25+ years of free electricity
- ✅ Increase your property’s value
- ✅ Help fight climate change with clean energy
Now, let’s look at how to install solar panel systems step by step.
Step 1: Assess Your Energy Needs
Before anything is installed, you need to understand how much electricity you consume.
✅ Check your monthly power bill:
See how many units (kWh) you use on average.
✅ Calculate daily consumption:
If you use 600 units/month, that’s about 20 units/day.
💡 A 1 kW solar system generates 4–5 units/day in India. So, to generate 20 units, you’ll need a 4–5 kW solar system.
This will help you size your system accurately.
Step 2: Conduct a Site Survey
The next step in learning how to install solar panels is checking your site’s feasibility.
Look for:
- ✅ Shade-free roof area (south-facing is ideal)
- ✅ Sufficient space (a 1 kW system needs ~100 sq ft)
- ✅ Strong structure to support the mounting
- ✅ Easy access to wiring and inverter location
A professional site survey ensures your solar system will perform at maximum efficiency.
Step 3: Choose the Right Type of Solar System
There are three types of solar systems:
🔌 On-Grid (Grid-Tied):
- Most common system
- Works with the grid
- Ideal for cities
- Supports net metering
🔋 Off-Grid:
- Works independently
- Uses batteries
- Ideal for remote or rural areas
🔄 Hybrid:
- Combines on-grid and battery
- Backup + bill savings
- Great for areas with frequent power cuts
Pick the right system based on your location, usage, and grid availability.
Step 4: Select Quality Components
Learning how to install solar panel systems means choosing the right parts. The major components are:
1. Solar Panels:
- Convert sunlight into DC power
- Choose Tier-1 panels with 25-year performance warranties
2. Inverter:
- Converts DC to AC
- Types: String Inverter, Micro-Inverter, or Hybrid
3. Mounting Structure:
- Holds panels securely
- Should be corrosion-resistant and angled properly
4. Battery (Optional):
- Needed for off-grid or hybrid systems
- Choose lithium or lead-acid based on budget and use
5. Cables, MCBs, Connectors, Surge Protectors
- Ensure safe and efficient operation
Step 5: Obtain Approvals (If Required)
If you’re installing an on-grid system, you may need:
- ✅ Net metering approval from your electricity board
- ✅ Inspection by DISCOM (distribution company)
- ✅ Application for government subsidy (if applicable)
The process may vary by state or country. A licensed solar installer will help with this.
Step 6: Install the Mounting Structure
Now, it’s time to begin the actual installation.
✅ Fix the mounting structure securely on the rooftop.
It should be:
- Tilted at a 20° to 30° angle (depending on your latitude)
- Facing south (in the northern hemisphere)
- Strong enough to withstand wind and rain
The tilt helps optimize solar generation throughout the year.
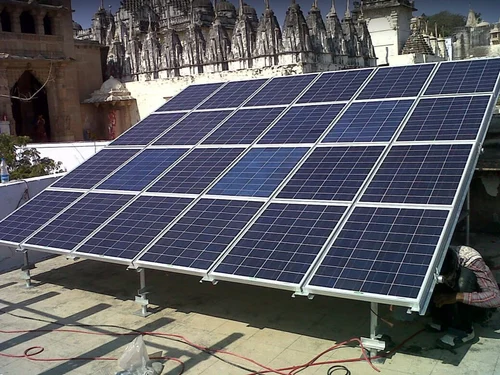
Step 7: Install the Solar Panels
Once the structure is ready:
- Panels are carefully placed and bolted down
- Proper spacing is maintained for airflow
- Panels are interconnected in series or parallel, based on design
Safety is key — gloves, tools, and precautions must be taken to prevent panel damage or injury.
Step 8: Connect Electrical Components
Now comes the wiring and integration:
- Connect the solar panels to the inverter
- Connect the inverter to your main power board
- Add MCBs, DCDB, ACDB, and safety fuses
- If batteries are used, connect them via a charge controller
In a grid-tied system, the setup allows power to be used in your home, with extra energy fed into the grid.
Step 9: Earthing and Lightning Protection
For safety and system longevity:
- Set up a proper earthing system
- Add lightning arrestors to prevent electrical surges
- Ensure the whole setup is grounded securely
This is critical, especially during monsoon or lightning-prone months.
Step 10: System Testing and Commissioning
Once everything is in place:
- All wiring is tested with a multimeter
- Inverter settings are calibrated
- Generation is monitored for 1–2 days
- If applicable, DISCOM conducts an inspection
Your solar system is now ready to generate clean energy!
Step 11: Activate Net Metering (If On-Grid)
If you have net metering:
- A bi-directional meter is installed
- You can now export excess power to the grid
- It’s reflected in your monthly power bill
Over time, you’ll see your electricity costs drop — in many cases to zero.
Step 12: Monitor & Maintain
Modern solar systems come with mobile apps or dashboards to track:
- Daily generation
- Lifetime output
- Carbon savings
- System health
Maintenance is minimal. Just:
- Clean the panels once every 15–30 days
- Inspect wiring annually
- Ensure no new shade or dust buildup
Most systems work efficiently for 25+ years with just minor care.
Summary: How to Install Solar Panel Systems – Checklist
| Step | Task |
|---|---|
| 1 | Analyze energy usage |
| 2 | Conduct site survey |
| 3 | Choose system type (on-grid/off-grid/hybrid) |
| 4 | Select components (panels, inverter, battery) |
| 5 | Apply for permits (if required) |
| 6 | Install mounting structure |
| 7 | Fix solar panels |
| 8 | Wire the system |
| 9 | Ensure safety with earthing & arrestors |
| 10 | Test and commission system |
| 11 | Activate net metering |
| 12 | Monitor and maintain |
FAQs – How to Install Solar Panels
❓ Can I install solar panels myself?
While DIY kits are available, professional installation is strongly recommended for safety, warranty, and efficiency reasons.
❓ How long does it take to install a solar system?
Residential systems usually take 1–3 days. Commercial or larger setups may take a week or more.
❓ Do I need permission to install solar panels?
Yes, for on-grid systems. You’ll need approvals from your electricity board and possibly your housing society.
❓ Will solar work during power cuts?
Only off-grid and hybrid systems with batteries provide backup. On-grid systems shut off during outages to protect linemen.
❓ What’s the lifespan of a solar panel?
Most panels last 25–30 years, with a gradual drop in efficiency (about 0.5–1% per year).